前面一节主要是在理论和设计层面讲解了预写日志 wal 组件,但是在代码实现当中,其实还蕴含着更多的细节。
rosedb 中的 wal 预写日志,既像传统关系型数据库一样保证了数据崩溃恢复和数据完整性,而且较为特殊的一点是,wal 预写日志本身又是实际存储数据的文件,这也是 bitcask 模型最大的特点。
wal 组件代码是开源的:https://github.com/rosedblabs/wal
wal 定义
wal 实际上是由多个文件组成的,每个文件叫做一个 Segment,下面是对 wal 结构体的定义:
 1
 2
 3
 4
 5
 6
 7
 8
 9
10
11
| type WAL struct {
activeSegment *segment // active segment file, used for new incoming writes.
olderSegments map[SegmentID]*segment // older segment files, only used for read.
options Options
mu sync.RWMutex
bytesWrite uint32
renameIds []SegmentID
pendingWrites [][]byte
pendingSize int64
pendingWritesLock sync.Mutex
}
|
其中最主要的是 activeSegment,表示当前活跃的 Segment 文件,用于新的写入(也可以读取);以及 olderSegments 表示旧的 Segment,这些文件都是被写满了的,不能写入,只能用于读取数据。
注意 olderSegments 是一个 map 结构,key 是文件对应的唯一标识,文件在命名的时候是连续递增的,如下图:
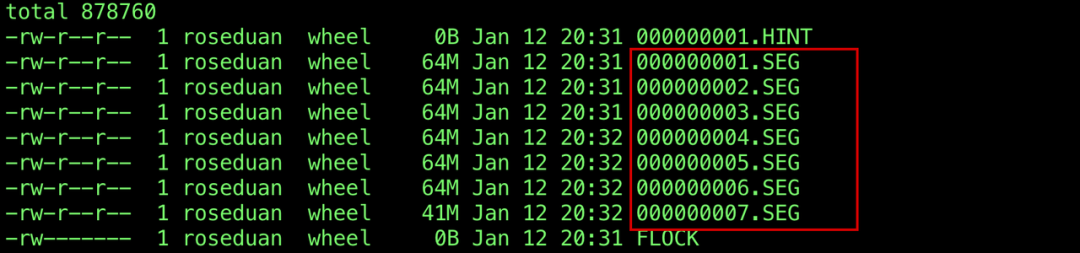
因此 Segment 文件的 id 就是文件名中的数字。
针对每个 Segment 文件,定义了一个 segment 结构体表示,主要包含 SegmentID、实际的文件描述符,以及当前的 block 信息,block 号和 block 大小。
 1
 2
 3
 4
 5
 6
 7
 8
 9
10
| type segment struct {
id SegmentID
fd *os.File
currentBlockNumber uint32
currentBlockSize uint32
closed bool
header []byte
startupBlock *startupBlock
isStartupTraversal bool
}
|
打开 wal
打开 wal 其实主要是打开对应目录中的所有 Segment 文件,这里会读取对应的目录,找到所有符合 Segment 文件后缀的文件,解析得到 SegmentID。
 1
 2
 3
 4
 5
 6
 7
 8
 9
10
11
12
13
14
15
16
17
18
| entries, err := os.ReadDir(options.DirPath)
if err != nil {
return nil, err
}
// get all segment file ids.
var segmentIDs []int
for _, entry := range entries {
if entry.IsDir() {
continue
}
var id int
_, err := fmt.Sscanf(entry.Name(), "%d"+options.SegmentFileExt, &id)
if err != nil {
continue
}
segmentIDs = append(segmentIDs, id)
}
|
如果这个目录是空的,也就是说没有获取到任何的 Segment 文件信息,那么只需要在这里初始化一个空的 Segment 文件即可,这个文件是目前的唯一一个 Segment,自然也就是当前活跃的 Segment 了。
否则,则说明存在 Segment 文件,需要将其按照 SegmentID 排序,id 最大的那个文件便是当前活跃文件,其他的文件就是 olderSegments。
 1
 2
 3
 4
 5
 6
 7
 8
 9
10
11
12
13
14
15
16
17
18
19
20
21
22
23
24
25
| // empty directory, just initialize a new segment file.
iflen(segmentIDs) == 0 {
segment, err := openSegmentFile(options.DirPath, options.SegmentFileExt,
initialSegmentFileID)
if err != nil {
return nil, err
}
wal.activeSegment = segment
} else {
// open the segment files in order, get the max one as the active segment file.
sort.Ints(segmentIDs)
for i, segId := range segmentIDs {
segment, err := openSegmentFile(options.DirPath, options.SegmentFileExt,
uint32(segId))
if err != nil {
return nil, err
}
if i == len(segmentIDs)-1 {
wal.activeSegment = segment
} else {
wal.olderSegments[segment.id] = segment
}
}
}
|
打开一个 Segment 文件的主要逻辑在方法 openSegmentFile 中,这里主要是调用系统函数,打开文件并得到一个文件句柄。
然后获取文件的大小,并且计算填充 currentBlockNumber 和 currentBlockSize,例如如果当前文件的大小是 100KB,那么当前的 block 号就是 100 ``/ 32 = 3,block 号是从 0 开始的;当前的 block size 就是 100 % 32 = 4,这两个属性主要是用在写入数据时候的开始位置。
 1
 2
 3
 4
 5
 6
 7
 8
 9
10
11
12
13
14
15
16
17
18
19
20
21
22
23
24
25
26
27
28
29
30
31
| // openSegmentFile a new segment file.
func openSegmentFile(dirPath, extName string, id uint32) (*segment, error) {
fd, err := os.OpenFile(
SegmentFileName(dirPath, extName, id),
os.O_CREATE|os.O_RDWR|os.O_APPEND,
fileModePerm,
)
if err != nil {
return nil, err
}
// set the current block number and block size.
offset, err := fd.Seek(0, io.SeekEnd)
if err != nil {
return nil, fmt.Errorf("seek to the end of segment file %d%s failed: %v", id, extName, err)
}
return &segment{
id: id,
fd: fd,
header: make([]byte, chunkHeaderSize),
currentBlockNumber: uint32(offset / blockSize),
currentBlockSize: uint32(offset % blockSize),
startupBlock: &startupBlock{
block: make([]byte, blockSize),
blockNumber: -1,
},
isStartupTraversal: false,
}, nil
}
|
wal 写入
接下来看看如何向 wal 写入一条新的数据,写入一条数据的逻辑在方法 Write 中。
首先会判断当前文件是否已经到了写入的阈值,如果已经到了,需要打开一个新的活跃文件用于写入。
 1
 2
 3
 4
 5
 6
 7
 8
 9
10
11
12
| func (wal *WAL) Write(data []byte) (*ChunkPosition, error) {
wal.mu.Lock()
defer wal.mu.Unlock()
if int64(len(data))+chunkHeaderSize > wal.options.SegmentSize {
return nil, ErrValueTooLarge
}
// if the active segment file is full, sync it and create a new one.
if wal.isFull(int64(len(data))) {
if err := wal.rotateActiveSegment(); err != nil {
return nil, err
}
}
|
方法 rotateActiveSegment 中会打开新的活跃文件,这里会将 Segment ID 递增,然后将之前的活跃文件放到 olderSegments 中,注意这里还调用了 Sync 方法将缓冲区的内容进行持久化,保证数据安全存储到磁盘中。
 1
 2
 3
 4
 5
 6
 7
 8
 9
10
11
12
13
14
15
| // rotateActiveSegment create a new segment file and replace the activeSegment.
func (wal *WAL) rotateActiveSegment() error {
if err := wal.activeSegment.Sync(); err != nil {
return err
}
wal.bytesWrite = 0
segment, err := openSegmentFile(wal.options.DirPath, wal.options.SegmentFileExt,
wal.activeSegment.id+1)
if err != nil {
return err
}
wal.olderSegments[wal.activeSegment.id] = wal.activeSegment
wal.activeSegment = segment
return nil
}
|
这些前置操作完成之后,才会真正向当前活跃 Segment 文件中写入数据,这里调用的是 Segment 的 Write 方法。
1
2
3
4
5
| // write the data to the active segment file.
position, err := wal.activeSegment.Write(data)
if err != nil {
return nil, err
}
|
再进入到 Segment 结构体的 Write 方法中,大致的写入流程分为了两步,一是写入到 buffer 当中,组织当前 chunk 的数据格式,填充 header 部分的内容,然后再调用文件的 write 方法写入数据。
1
2
3
4
5
6
7
8
9
| // write all data to the chunk buffer
pos, err = seg.writeToBuffer(data, chunkBuffer)
if err != nil {
return
}
// write the chunk buffer to the segment file
if err = seg.writeChunkBuffer(chunkBuffer); err != nil {
return
}
|
再展开说明这里为什么会使用到一个 byte buffer 呢,因为用户写入的 data 数据是一个字节数组,但是我们实际写入到磁盘的数据,需要加上 header 部分,如果 data 较大的话,还会将其拆分为多个 chunk 进行写入,每个 chunk 都会有对应的 header。
如果这里每次都重新去 make 一个新的字节数组的话,那么会造成内存的频繁分配和释放,但这完全是没有必要的,我们可以复用这些字节数组的内存空间,所以可以使用到 Go 语言中的 sync.Pool 进行资源的池化,具体是使用到了一个开源的第三方库 https://github.com/valyala/bytebufferpool。
回到我们的写入逻辑,实际上就是将数据按照固定的格式进行组织,并缓存到 byte buffer 中。
首先会判断如果当前 block 的容量已经很小了,小到不能够容纳一个 chunkHeader(7 字节),那么当前 block 就不能够使用了,直接对齐填充,然后开启一个新的 block。
 1
 2
 3
 4
 5
 6
 7
 8
 9
10
11
12
13
| // if the left block size can not hold the chunk header, padding the block
if seg.currentBlockSize+chunkHeaderSize >= blockSize {
// padding if necessary
if seg.currentBlockSize < blockSize {
p := make([]byte, blockSize-seg.currentBlockSize)
chunkBuffer.B = append(chunkBuffer.B, p...)
padding += blockSize - seg.currentBlockSize
// a new block
seg.currentBlockNumber += 1
seg.currentBlockSize = 0
}
}
|
然后到了一个关键的步骤,如果写入的 chunk 是能够完全容纳到当前 block 当中,那么 chunk 的类型就是 FULL,对其进行填充,然后存储到 byte buffer 中。
1
2
3
4
| // The entire chunk can fit into the block.
if seg.currentBlockSize+dataSize+chunkHeaderSize <= blockSize {
seg.appendChunkBuffer(chunkBuffer, data, ChunkTypeFull)
position.ChunkSize = dataSize + chunkHeaderSize
|
appendChunkBuffer 方法主要是填充 header 部分,分别是 CRC 校验和、数据长度、Chunk 类型,然后将 header 部分和数据部分都存储到 buffer 当中。
 1
 2
 3
 4
 5
 6
 7
 8
 9
10
11
12
13
14
| func (seg *segment) appendChunkBuffer(buf *bytebufferpool.ByteBuffer, data []byte, chunkType ChunkType) {
// Length 2 Bytes index:4-5
binary.LittleEndian.PutUint16(seg.header[4:6], uint16(len(data)))
// Type 1 Byte index:6
seg.header[6] = chunkType
// Checksum 4 Bytes index:0-3
sum := crc32.ChecksumIEEE(seg.header[4:])
sum = crc32.Update(sum, crc32.IEEETable, data)
binary.LittleEndian.PutUint32(seg.header[:4], sum)
// append the header and data to segment chunk buffer
buf.B = append(buf.B, seg.header...)
buf.B = append(buf.B, data...)
}
|
然后是写入的另一种情况,如果当前的 block 不能够容纳 Chunk,则需要对 Chunk 进行拆分,这里是在一个 for 循环当中处理的:
 1
 2
 3
 4
 5
 6
 7
 8
 9
10
11
12
13
14
15
16
17
18
19
20
21
22
23
24
25
26
27
| for leftSize > 0 {
chunkSize := blockSize - currBlockSize - chunkHeaderSize
if chunkSize > leftSize {
chunkSize = leftSize
}
var end = dataSize - leftSize + chunkSize
if end > dataSize {
end = dataSize
}
// append the chunks to the buffer
var chunkType ChunkType
switch leftSize {
case dataSize: // First chunk
chunkType = ChunkTypeFirst
case chunkSize: // Last chunk
chunkType = ChunkTypeLast
default: // Middle chunk
chunkType = ChunkTypeMiddle
}
seg.appendChunkBuffer(chunkBuffer, data[dataSize-leftSize:end], chunkType)
leftSize -= chunkSize
blockCount += 1
currBlockSize = (currBlockSize + chunkSize + chunkHeaderSize) % blockSize
}
|
chunkSize 表示当前写入的 Chunk 的大小,如果是第一个,则类型是 FIRST,如果是最后一个,则类型是 LAST,否则则是 MIDDLE 类型。
每次循环 leftSize 会逐渐递减,直到全部拆分完毕,则原插入的数据就分拆完成,并且完全按照 Chunk 缓存到了 buffer 中。
这里大家可以按照代码举一个具体的示例进行分析。
前面的解析、拆分、填充 header 完成后,需要写入的数据都已经按照固定的格式缓存到了 buffer 当中,这时候只需要调用文件的写入方法,写入这些数据就可以了。
 1
 2
 3
 4
 5
 6
 7
 8
 9
10
11
12
13
14
15
| // write the pending chunk buffer to the segment file
func (seg *segment) writeChunkBuffer(buf *bytebufferpool.ByteBuffer) error {
if seg.currentBlockSize > blockSize {
return errors.New("the current block size exceeds the maximum block size")
}
// write the data into underlying file
if _, err := seg.fd.Write(buf.Bytes()); err != nil {
return err
}
// the cached block can not be reused again after writes.
seg.startupBlock.blockNumber = -1
return nil
}
|
wal 读取
再来看一下如何从 wal 中读取数据。
其实在写入的时候,我们的数据写入到了哪个位置,已经是明确的了,并且我们也将这个信息作为参数返回给了调用者,调用者可以将这个位置信息保存起来,或者进行其他处理都是可以的。
这个位置信息主要包含写入到了哪个 Segment 文件当中,以及写入到了哪个 block,并且 block 的偏移是多少,这些信息使用 ChunkPosition 结构体表示。
 1
 2
 3
 4
 5
 6
 7
 8
 9
10
11
| // ChunkPosition represents the position of a chunk in a segment file.
// Used to read the data from the segment file.
type ChunkPosition struct {
SegmentId SegmentID
// BlockNumber The block number of the chunk in the segment file.
BlockNumber uint32
// ChunkOffset The start offset of the chunk in the segment file.
ChunkOffset int64
// ChunkSize How many bytes the chunk data takes up in the segment file.
ChunkSize uint32
}
|
因此我们从 wal 中读取数据的时候,需要将这个 ChunkPosition 作为参数传递进来,我们才能够知道应该读哪个文件,并且从文件的哪个位置开始读取。
下面是 Read 方法的入口:
 1
 2
 3
 4
 5
 6
 7
 8
 9
10
11
12
13
14
15
16
17
18
19
20
| // Read reads the data from the WAL according to the given position.
func (wal *WAL) Read(pos *ChunkPosition) ([]byte, error) {
wal.mu.RLock()
defer wal.mu.RUnlock()
// find the segment file according to the position.
var segment *segment
if pos.SegmentId == wal.activeSegment.id {
segment = wal.activeSegment
} else {
segment = wal.olderSegments[pos.SegmentId]
}
if segment == nil {
return nil, fmt.Errorf("segment file %d%s not found", pos.SegmentId, wal.options.SegmentFileExt)
}
// read the data from the segment file.
return segment.Read(pos.BlockNumber, pos.ChunkOffset)
}
|
首先会根据 Segment ID 查找对应的文件,如果没有找到的话则报错。
然后进入到 Segment 的 Read 方法中。
在 read 文件内容的时候,以 block 为单位进行读取,读取的起始位置就是 blockNumber * blockSize,然后数据的起始位置就是传递进来的参数 chunkOffset,这样就能够知道 Chunk 的 header 内容了,由于 header 占据的是固定的 7 字节,所以对其进行解析,得到数据长度以及 Chunk 类型。
 1
 2
 3
 4
 5
 6
 7
 8
 9
10
11
12
13
14
15
16
17
18
19
20
| // header
header := block[chunkOffset : chunkOffset+chunkHeaderSize]
// length
length := binary.LittleEndian.Uint16(header[4:6])
// copy data
start := chunkOffset + chunkHeaderSize
result = append(result, block[start:start+int64(length)]...)
// check sum
checksumEnd := chunkOffset + chunkHeaderSize + int64(length)
checksum := crc32.ChecksumIEEE(block[chunkOffset+4 : checksumEnd])
savedSum := binary.LittleEndian.Uint32(header[:4])
if savedSum != checksum {
return nil, nil, ErrInvalidCRC
}
// type
chunkType := header[6]
|
如果 Chunk 的类型是 FULL 或者 LAST,则说明已经读取到了完整的数据,则跳出外层的循环。
否则,跳转到下一个 block 继续读取。
 1
 2
 3
 4
 5
 6
 7
 8
 9
10
11
12
13
| if chunkType == ChunkTypeFull || chunkType == ChunkTypeLast {
nextChunk.BlockNumber = blockNumber
nextChunk.ChunkOffset = checksumEnd
// If this is the last chunk in the block, and the left block
// space are paddings, the next chunk should be in the next block.
if checksumEnd+chunkHeaderSize >= blockSize {
nextChunk.BlockNumber += 1
nextChunk.ChunkOffset = 0
}
break
}
blockNumber += 1
chunkOffset = 0
|
wal 批量写入
前面介绍的写入数据的方法,只写入了一条数据,如果调用者有多条数据的话,希望能够在一个批次中一次性全部写入,那么可以采用 wal 的批量写入方法。
批量写入能够大幅度提升多条数据写入的性能,因为能够减少系统调用次数,将多次磁盘 IO 转化为一次。
具体的实现方法比较简单,首先会调用 PendingWrites 方法将需要写入的数据进行缓存,这里我们使用了一个数组对这些数据进行暂存。
 1
 2
 3
 4
 5
 6
 7
 8
 9
10
11
| // PendingWrites add data to wal.pendingWrites and wait for batch write.
// If the data in pendingWrites exceeds the size of one segment,
// it will return a 'ErrPendingSizeTooLarge' error and clear the pendingWrites.
func (wal *WAL) PendingWrites(data []byte) {
wal.pendingWritesLock.Lock()
defer wal.pendingWritesLock.Unlock()
size := wal.maxDataWriteSize(int64(len(data)))
wal.pendingSize += size
wal.pendingWrites = append(wal.pendingWrites, data)
}
|
多条数据暂存完成后,需要写入的数据都维护在变量 pendingWrites 中了,这时候可以调用 WriteAll 方法一次性将这些数据全部写入。
需要注意这里和之前一样,还是会判断如果文件已经到了阈值,那么会打开一个新的活跃文件。
 1
 2
 3
 4
 5
 6
 7
 8
 9
10
11
12
| // if the active segment file is full, sync it and create a new one.
if wal.activeSegment.Size()+wal.pendingSize > wal.options.SegmentSize {
if err := wal.rotateActiveSegment(); err != nil {
return nil, err
}
}
// write all data to the active segment file.
positions, err := wal.activeSegment.writeAll(wal.pendingWrites)
if err != nil {
return nil, err
}
|
然后进入到 Segment 的 writeAll 方法当中,执行实际的写入逻辑。
这里和之前的单条数据写入类似,会将所有的数据缓存到 buffer 当中,这个时候需要计算得到最终的返回值 ChunkPosition,因为写入的时候是一次性将所有的字节内容写到文件了,到这个时候并不能获取到每个 Chunk 的位置信息。
 1
 2
 3
 4
 5
 6
 7
 8
 9
10
| // write all data to the chunk buffer
var pos *ChunkPosition
positions = make([]*ChunkPosition, len(data))
for i := 0; i < len(positions); i++ {
pos, err = seg.writeToBuffer(data[i], chunkBuffer)
if err != nil {
return
}
positions[i] = pos
}
|
然后调用 writeChunkBuffer 方法写入到文件当中,这里和之前是一样的。
需要注意,如果批量写入失败的话,我们需要回滚状态,因为为了提前拿到 ChunkPosition 的信息,在缓存到 buffer 中的时候,就将 currentBlockNumber 和 currentBlockSize 进行了修改。如果写入失败的话,就将这些信息还原到之前的状态。
 1
 2
 3
 4
 5
 6
 7
 8
 9
10
11
12
13
14
| // if any error occurs, restore the segment status
originBlockNumber := seg.currentBlockNumber
originBlockSize := seg.currentBlockSize
// init chunk buffer
chunkBuffer := bytebufferpool.Get()
chunkBuffer.Reset()
defer func() {
if err != nil {
seg.currentBlockNumber = originBlockNumber
seg.currentBlockSize = originBlockSize
}
bytebufferpool.Put(chunkBuffer)
}()
|
wal 全量读取
前面的读取方法,都是根据 ChunkPosition 获取一条数据,有时候需要遍历 wal 中所有的 Segment 文件,并且获取到所有的数据。例如在 rosedb 当中,会在启动的时候遍历所有的数据去构建索引。
因此我们需要一种方式来遍历读取 wal 所有的数据,实际上就是对每个 Segment 文件中的数据进行读取。
这里定义了一个 Reader 结构体,来记录遍历的状态。
 1
 2
 3
 4
 5
 6
 7
 8
 9
10
| // Reader represents a reader for the WAL.
// It consists of segmentReaders, which is a slice of segmentReader
// structures sorted by segment id,
// and currentReader, which is the index of the current segmentReader in the slice.
//
// The currentReader field is used to iterate over the segmentReaders slice.
type Reader struct {
segmentReaders []*segmentReader
currentReader int
}
|
结构体 segmentReader 主要记录了一个 Segment 在遍历时的状态:
1
2
3
4
5
6
7
8
| // segmentReader is used to iterate all the data from the segment file.
// You can call Next to get the next chunk data,
// and io.EOF will be returned when there is no data.
type segmentReader struct {
segment *segment
blockNumber uint32
chunkOffset int64
}
|
首先会通过 NewReader 方法获取到一个 Reader 结构,这个方法其实就是将所有的 Segment 文件按照从小到大排序,并且放到 segmentReaders 数组当中。
1
2
3
4
5
6
7
8
| // get all segment readers.
var segmentReaders []*segmentReader
for _, segment := range wal.olderSegments {
if segId == 0 || segment.id <= segId {
reader := segment.NewReader()
segmentReaders = append(segmentReaders, reader)
}
}
|
拿到 Reader 之后,可以调用 Next 方法一直获取下一条数据。
 1
 2
 3
 4
 5
 6
 7
 8
 9
10
11
12
| func (r *Reader) Next() ([]byte, *ChunkPosition, error) {
if r.currentReader >= len(r.segmentReaders) {
return nil, nil, io.EOF
}
data, position, err := r.segmentReaders[r.currentReader].Next()
if err == io.EOF {
r.currentReader++
return r.Next()
}
return data, position, err
}
|
注意到这里是一个递归,因为当前 Segment 文件如果遍历完的话,就会开始遍历下一个文件,每个文件的读取方法都是一样的。
然后是 segmentReader 的 Next 方法,这里就是在单个 Segment 文件中获取一条实际的数据。
1
2
3
4
5
6
7
| value, nextChunk, err := segReader.segment.readInternal(
segReader.blockNumber,
segReader.chunkOffset,
)
if err != nil {
return nil, nil, err
}
|
读取数据调用的方法和前面单条数据的读取逻辑是一样的,这里需要返回 nextChunk 的信息,表示下一条数据的起始位置。这样就可以循环调用 Next 方法从文件中获取数据,直到遍历完成。
广告区:
《从零实现 KV 存储》,使用 Rust 和 Go 两种语言实现,手把手教学,只需要基础的语法知识,即可学会一个硬核实战项目!
《从零实现 SQL 数据库》,使用 Rust 手写一个数据库系统,超级硬核,Rust 实战项目首选!
课程详情:https://roseduan.cn/course/